Rebuilding the Front Brake Calipers
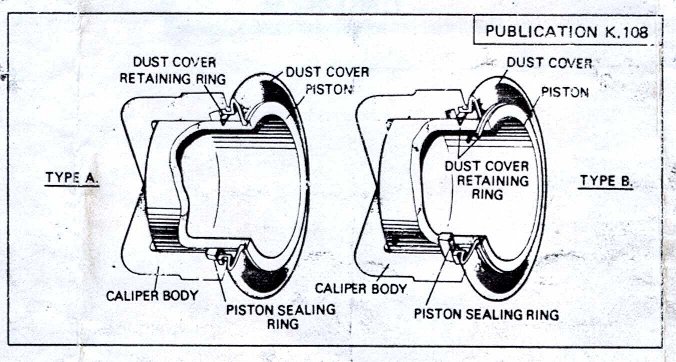
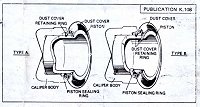 Here is a cut-away view showing the relative positioning of the caliper body, piston,
seal dust cover and dust cover retaining ring. The calipers on my 110 were as illustrated on the left.
As usual you can click on the pictures on this page to see a bigger version.
Here is a cut-away view showing the relative positioning of the caliper body, piston,
seal dust cover and dust cover retaining ring. The calipers on my 110 were as illustrated on the left.
As usual you can click on the pictures on this page to see a bigger version.
By far the worst bit of this job is cleaning the callipers before you start.
Before you dismantle anything block up the hydraulic connections and wire brush or scrape all the loose mud and rust off.
Carefully cut away the dust seals, and gasp in horror at the exposed portion of the pistons.
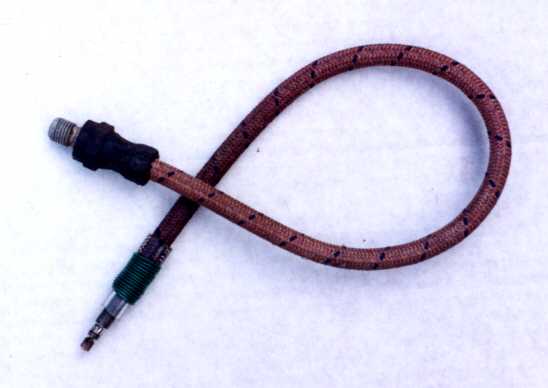
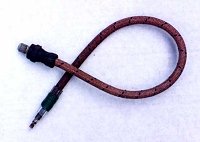 This picture shows how you can make a simple gadget for removing the caliper pistons.
It consists of an old flexible brake hose with one end cut off and replaced with a bicycle valve.
The normal threaded end needs to be plain with a shoulder to seal against the caliper.
I used an old flexy from the back axle. It only looks braided because I peeled off the outer rubber out of inquisitiveness!
It is possible to use this gadget with a bicycle pump to blow the caliper pistons out of the body.
I advise putting a rag between the pistons to absorb some of the energy when they pop out.
In all likelihood one will be stiffer than the other and you may have to wire one in place to get the second one out.
Don't be tempted to lever the pistons out by using a screwdriver in the dust seal slot. This could easily ruin them.
This picture shows how you can make a simple gadget for removing the caliper pistons.
It consists of an old flexible brake hose with one end cut off and replaced with a bicycle valve.
The normal threaded end needs to be plain with a shoulder to seal against the caliper.
I used an old flexy from the back axle. It only looks braided because I peeled off the outer rubber out of inquisitiveness!
It is possible to use this gadget with a bicycle pump to blow the caliper pistons out of the body.
I advise putting a rag between the pistons to absorb some of the energy when they pop out.
In all likelihood one will be stiffer than the other and you may have to wire one in place to get the second one out.
Don't be tempted to lever the pistons out by using a screwdriver in the dust seal slot. This could easily ruin them.
Prise out the old piston seal being ultra careful not to scratch anything
Remove remnants of the dust seals from the caliper body by first carefully prising out the dust cover retaining
rings using a broad bladed knife inserted between the caliper body and the bottom lip of the ring.
Be ever so careful not to wreck them. You'll need to re-use them and they are not available any more.
They are soft brass to make things worse. The remaining rubber can then be pulled from the groove in the caliper body.
It is likely that by now there'll be brake fluid everywhere and the caliper will be a horrible mucky mess.
Classically at this point you are advised to wash all parts thoroughly in clean brake fluid or methylated spirits.
To me the idea of getting even more covered in brake fluid did not appeal, and I didn't have enough meths.
I actually scrubbed them clean with an old toothbrush and washing-up liquid solution, then rinsed them thoroughly,
dried them as well as possible, and put them in a cool oven to dry out before rust could form. This works a treat,
but you may have to choose the right time to use the oven!
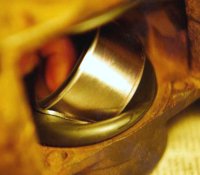
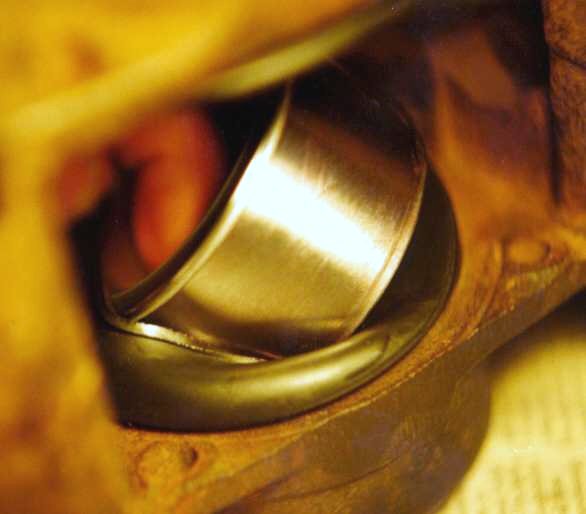
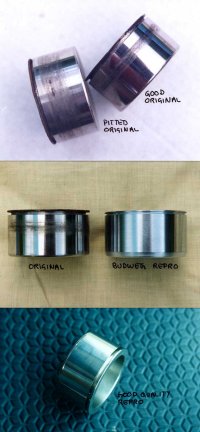 The original pistons are chrome plated. Clean off all the adhering muck with 0000 grade wire wool and inspect
them thoroughly. The surface may have become discoloured as shown here.
The original pistons are chrome plated. Clean off all the adhering muck with 0000 grade wire wool and inspect
them thoroughly. The surface may have become discoloured as shown here.
If it is perfectly smooth and free from surface defects it can be re-used.
If they are at all pitted or the chrome plating is flaking away, you must replace them.
Replacement pistons are available and vary in quality. The best are chrome plated and as beautifully made as the originals.
There are also Budweg reproductions available which look as though thy are made of stainless steel,
but both the surface finish and general standard of machining is inferior.
Note that the groove for the dust cover can be either wide or narrow.
Make sure that the seal kit you buy is correct for your calipers and that the new pistons are of the correct type also.
I made this mistake originally and it was most frustrating.
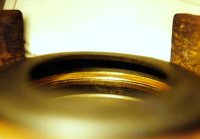
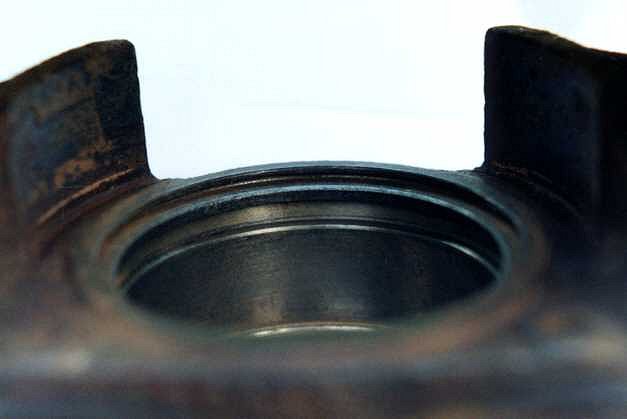
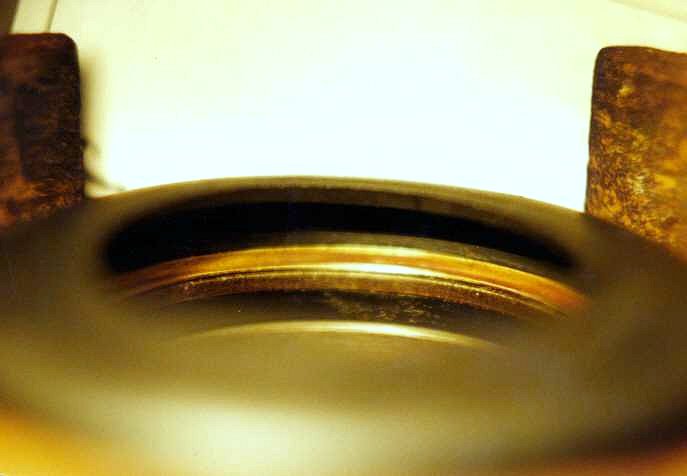
 This picture shows the bare caliper body, cleaned and ready to be re-fitted with the new
seal dust cover and piston.
This picture shows the bare caliper body, cleaned and ready to be re-fitted with the new
seal dust cover and piston.
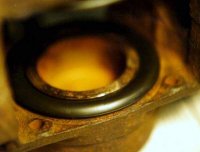
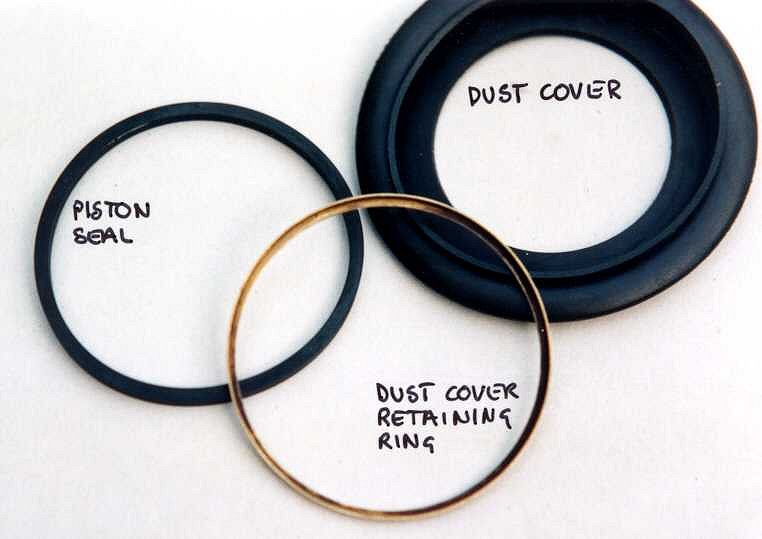
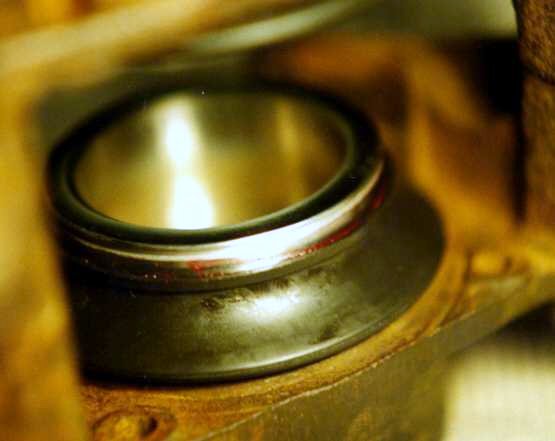
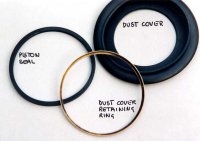 and this shows the new piston seal and dust cover... and the dust cover retaining ring that was removed
earlier and cleaned.
and this shows the new piston seal and dust cover... and the dust cover retaining ring that was removed
earlier and cleaned.
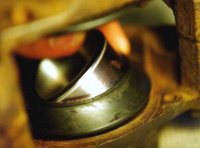
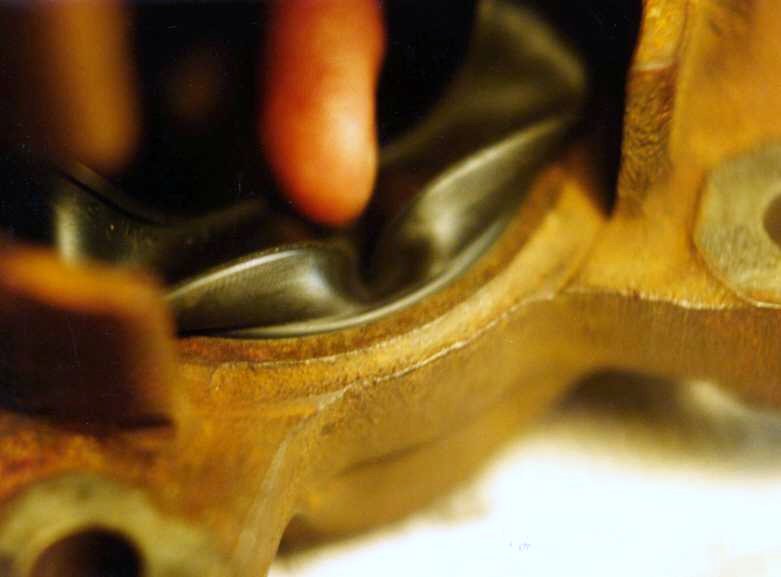
 This picture shows how the thing should look once the new parts have been fitted, prior to fitting the piston.
Fitting the new parts can be quite fiddly and frustrating so make sure you are working in good light with the
caliper at a height where you can see into the bores easily.
First smear red brake rubber grease all over the piston seal and fit it into the lower groove in the caliper.
Do not be tempted to use any other sort of grease as this will destroy the rubber with time.
Make sure the retaining rings are flat and not distorted in any way. If there are , carefully bend them back to shape.
Take the dust cover and put the retaining ring inside it so that the flange is towards the wide opening of the
dust cover with the protruding lip Do not put rubber grease on the ring or the dust cover lip.
Next, position the dust cover over the caliper bore and try and wiggle it about so that the edge of the lip
engages with the recess in the caliper body leaving the retaining ring free inside the dust cover.
Gently centralise the ring over the bore, and working from opposite sides push the retainer down so that the dust
cover lip is trapped between the caliper body and the retainer.
I found that pushing the outer part of the dust cover down onto the ring with a rolling motion towards the bore
while holding the opposite side in place quite effective. This is very fiddly because you are working blind.
You may find that as you press one part home another part pops out,
so you may end up needing several pairs of hands and a lot of patience.
As soon as the ring will stay in place long enough to allow it,
take a blunt screwdriver and gently push the retainer fully home as shown in the picture.
 Fold the dust cover back on its self all the way round to check that the dust cover is seating properly.
Don't be afraid to do this. If the ring is in properly the seal will not come out, and besides it needs to be robust.
Fold the dust cover back on its self all the way round to check that the dust cover is seating properly.
Don't be afraid to do this. If the ring is in properly the seal will not come out, and besides it needs to be robust.
 Smear the piston liberally with rubber grease and hook one side under the dust seal near the narrow opening in the caliper.
 Keeping this side under the dust seal lip, pull the lip diametrically opposite,
over the bottom edge of the piston, so that it looks as if it's in crookedly.
Keeping this side under the dust seal lip, pull the lip diametrically opposite,
over the bottom edge of the piston, so that it looks as if it's in crookedly.
 Now carefully manipulate the piston into the upright position, and allow the back edge to emerge from within the dust seal.
 Push the piston home, and allow the dust seal to snap into the groove round the edge of the piston.
BACK TO THE TECHNICAL MENU
HOME
 This picture shows how you can make a simple gadget for removing the caliper pistons.
It consists of an old flexible brake hose with one end cut off and replaced with a bicycle valve.
The normal threaded end needs to be plain with a shoulder to seal against the caliper.
I used an old flexy from the back axle. It only looks braided because I peeled off the outer rubber out of inquisitiveness!
It is possible to use this gadget with a bicycle pump to blow the caliper pistons out of the body.
I advise putting a rag between the pistons to absorb some of the energy when they pop out.
In all likelihood one will be stiffer than the other and you may have to wire one in place to get the second one out.
Don't be tempted to lever the pistons out by using a screwdriver in the dust seal slot. This could easily ruin them.
This picture shows how you can make a simple gadget for removing the caliper pistons.
It consists of an old flexible brake hose with one end cut off and replaced with a bicycle valve.
The normal threaded end needs to be plain with a shoulder to seal against the caliper.
I used an old flexy from the back axle. It only looks braided because I peeled off the outer rubber out of inquisitiveness!
It is possible to use this gadget with a bicycle pump to blow the caliper pistons out of the body.
I advise putting a rag between the pistons to absorb some of the energy when they pop out.
In all likelihood one will be stiffer than the other and you may have to wire one in place to get the second one out.
Don't be tempted to lever the pistons out by using a screwdriver in the dust seal slot. This could easily ruin them.
 The original pistons are chrome plated. Clean off all the adhering muck with 0000 grade wire wool and inspect
them thoroughly. The surface may have become discoloured as shown here.
The original pistons are chrome plated. Clean off all the adhering muck with 0000 grade wire wool and inspect
them thoroughly. The surface may have become discoloured as shown here.
 This picture shows the bare caliper body, cleaned and ready to be re-fitted with the new
seal dust cover and piston.
This picture shows the bare caliper body, cleaned and ready to be re-fitted with the new
seal dust cover and piston.
 and this shows the new piston seal and dust cover... and the dust cover retaining ring that was removed
earlier and cleaned.
and this shows the new piston seal and dust cover... and the dust cover retaining ring that was removed
earlier and cleaned.
 This picture shows how the thing should look once the new parts have been fitted, prior to fitting the piston.
 Fold the dust cover back on its self all the way round to check that the dust cover is seating properly.
Don't be afraid to do this. If the ring is in properly the seal will not come out, and besides it needs to be robust.
Fold the dust cover back on its self all the way round to check that the dust cover is seating properly.
Don't be afraid to do this. If the ring is in properly the seal will not come out, and besides it needs to be robust.
 Smear the piston liberally with rubber grease and hook one side under the dust seal near the narrow opening in the caliper.
 Keeping this side under the dust seal lip, pull the lip diametrically opposite,
over the bottom edge of the piston, so that it looks as if it's in crookedly.
Keeping this side under the dust seal lip, pull the lip diametrically opposite,
over the bottom edge of the piston, so that it looks as if it's in crookedly.
 Now carefully manipulate the piston into the upright position, and allow the back edge to emerge from within the dust seal.
 Push the piston home, and allow the dust seal to snap into the groove round the edge of the piston.